Beginners who just stepped into Bitcoin may find the whole concept overwhelming. If you are new then to get started you don’t need to deeply understand the technology behind Bitcoin or its technical details. Just get familiar with how a wallet works, how to send, receive coins, how to view transactions on the block explorer and some other basic stuff.
Remember that “Not your Keys, not your coins”. So do not hold your coins on the exchange. Transfer them from exchange to the wallet where you control your private keys.
For desktop there are two wallets namely Bitcoin core and Electrum. They are free, open source and offers complete control.
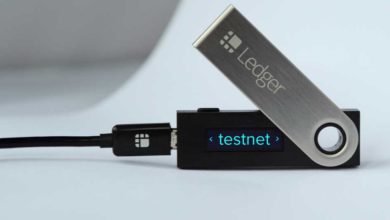
Now the best way to understand how to use these wallets without risking your real money is by trying out the Testnet. That is connecting both core wallet and electrum wallet to Bitcoin testnet.
Here in this beginner guide we’ll cover about Bitcoin Testnet. A zero-risk network that helps beginners to learn how to use Bitcoin and understand Bitcoin transactions.
Bitcoin Testnet
Testnet is an alternative network and a clone of original Bitcoin blockchain. This network is setup specifically for testing and experimental purposes. Whether you are a developer or a beginner; testnet allows you to test and experiment the various features of Bitcoin without risking your real coins.
Testnet just uses a different blockchain and the coins on testnet have no value. Other than that everything else remains the same as the main Bitcoin network.
There are nodes. Blocks are created every 10 minutes. Real miners are verifying each transaction and recording it on the blockchain. Even new coins are created only through mining. These coins can be obtained for free from Bitcoin testnet faucets.
To receive these coins and to start learning we first need to setup testnet wallet. Both Bitcoin core and electrum wallet has the ability to connect to test network. But the feature is not available in GUI by default. We’ll have to use a special flag that puts electrum and core wallet into testnet mode.
Here let’s see how to setup Bitcoin core and Electrum wallet and connect them to Bitcoin Testnet.
Connecting Bitcoin core and Electrum to Testnet
Should I try Bitcoin core or Electrum Bitcoin? The choice is yours.
What you need to know is that Bitcoin core is a full Bitcoin client. It takes up a lot of space and consumes enormous amount of bandwidth as it downloads the entire blockchain to your PC.
Whereas the Electrum Bitcoin wallet is a light client that uses remote network to fetch the blockchain data. It doesn’t download much data. You can just setup and start using the wallet right away.
Compared to electrum; core wallet lacks some features like for example Multisignature, Lightning network and Hardware wallet support.
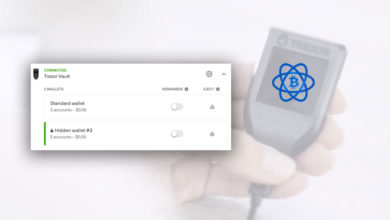
If you are looking to learn how multisg setup works, how recovery mnemonic seed phrases works then go with Electrum.
Anyways in this tutorial we’ll cover both electrum and core wallet. That is running Bitcoin core wallet and Electrum on testnet.
How to connect Electrum to Testnet
As we said there is no separate wallet for testnet. All you have to do is create a shortcut and start the wallet file with a special flag. This way you can switch between testnet and your regular wallets anytime on the same machine.
We hope you have the wallet downloaded and installed. If not you can download it from here:
Electrum Download: https://electrum.org/#download
Choose the operating system and download the file. Also make sure to verify electrum signatures to ensure that your copy is genuine.
Now before setting up Electrum testnet launcher run the wallet in mainnet mode once. It will create all the essential files that is needed to run further.
Once done close the wallet and follow the guidelines below.
Windows:
1. Right click the electrum.exe file and click on create shortcut.
2. Rename the shortcut to Electrum Testnet.
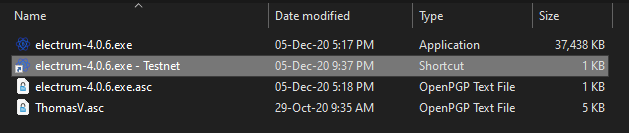
3. Now right click the testnet file and open properties. Navigate to shortcut tab and add --testnet flag at the end of the target location.
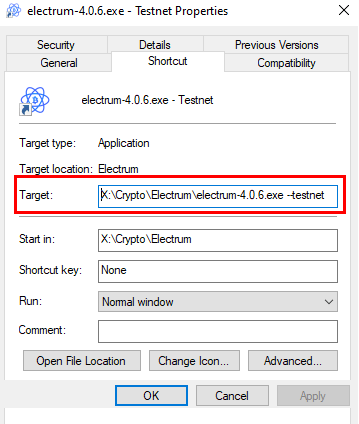
Example:
"C:\Program Files (x86)\Electrum\electrum-4.0.6.exe" --testnet
Click apply and then OK to save changes. That’s it! Now open the Electrum shortcut which will launch electrum in testnet mode.
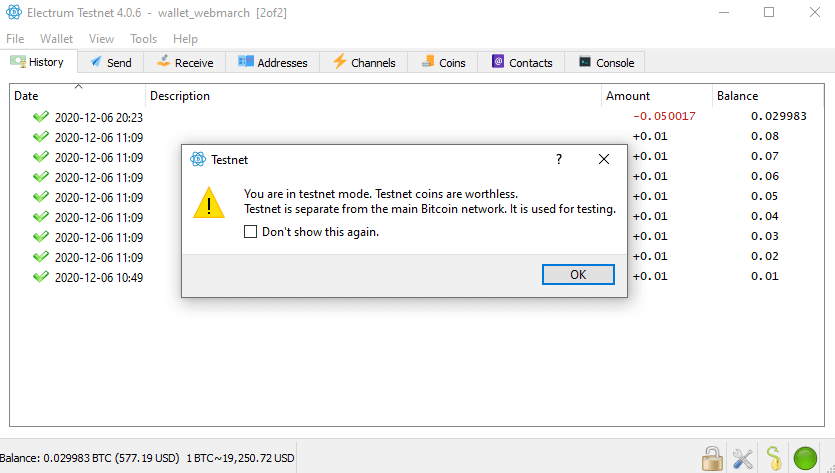
You should see the following message in your electrum wallet.
“You are in testnet mode. Testnet coins are worthless.
Testnet is separate from the main Bitcoin network. It is used for testing.”
Mac:
1. Run Terminal and type the following to open Nano text editor.
nano ~/Desktop/electrum
2. Now in the Nano text editor paste the following code.
#!/bin/bash
open -n /Applications/Electrum.app --args --testnet
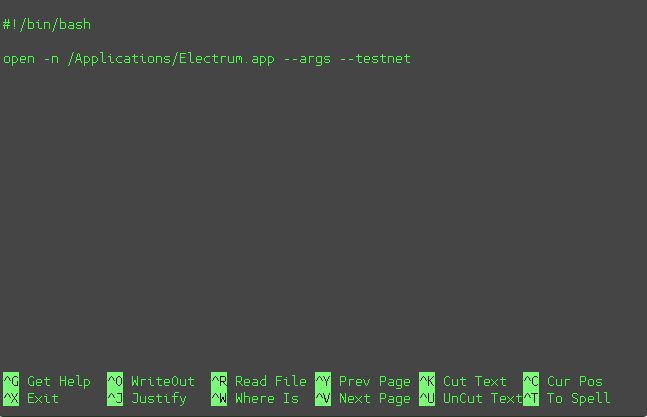
3. Once done save the file by pressing CTRL + X —>> Y followed by the return key. A new electrum file should appear on your desktop.
4. Now to make the file executable type the following code in Terminal window
chmod +x ~/Desktop/electrum
You should now find the electrum icon on your Desktop. Double click it to open electrum in testnet mode.
Testnet on Ubuntu:
1. Run Terminal and open Nano text editor by typing the following code
nano ~/Desktop/electrum.desktop
2. When Nano editor is opened in Terminal paste the following:
[Desktop Entry]
Type=Application
Name=Electrum Testnet
Exec=electrum --testnet
Icon=electrum
3. Now save the editor by pressing CTRL + X —>> Y followed by the enter key. You should see Electrum Testnet file on your Desktop.
4. Make it an executable file by running the following command in Terminal.
chmod +x ~/Desktop/electrum.desktop
That’s it. Double click the Electrum Testnet file to start it in Testnet mode.
Note: To ensure whether your wallet is connected to testnet or mainnet just check the address in receiving tab. Testnet address starts with “m”, “n” or “2M” and “2N” depending on the seed / address type you choose. Whereas Mainnet address begin with “1”, “3” and “bc”. Just keep that in mind before you make any transaction.
Alright! Let’s now see Bitcoin core setup for testnet.
How to connect Bitcoin core wallet to Testnet?
The procedure is same as electrum wallet. You need to start the Bitcoin core instance with ‘-testnet’ flag. This will direct the wallet software to connect to testnet blockchain instead of main network.
Before you connect to testnet, setup and launch the wallet which will create all the essential files.
Windows:
- Go to the installation folder. Now right click the Bitcoin-qt.exe file and create shortcut.
- Name the shortcut to Bitcoin-qt.exe – Testnet.
- Next right click the shortcut file, open properties, navigate to shortcut tab and add
-testnetat the end of the target field.
Example:
C:\Program Files\bitcoin-0.20.1\bin\bitcoin-qt.exe -testnet
When done save it and open this shortcut file to open Bitcoin QT in testnet mode.
Alternatively you can also put testnet=1 in the bitcoin.conf file.
Mac:
Open Bitcoin core, go to preferences and open configuration file. In the configuration file add the following command.
testnet=1
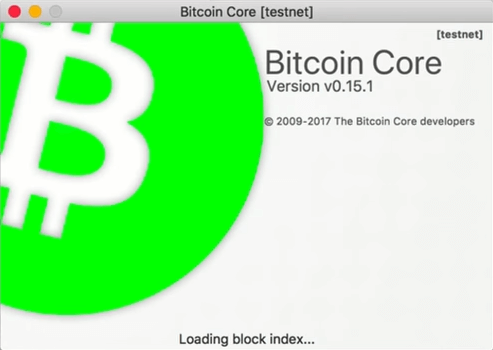
Note: Bitcoin core wallet when in testnet it shows the green logo. On mainnet it shows the orange logo.
Ubuntu:
On your Ubuntu machine download the latest version from Bitcoin.org (https://bitcoin.org/en/bitcoin-core/) and start with the following commands. As of writing this article the latest version was 25.0. Modify this accordingly.
cd ~/Documents
wget https://bitcoin.org/bin/bitcoin-core-25.0/bitcoin-25.0-x86_64-linux-gnu.tar.gz
tar xfz bitcoin-25.0-x86_64-linux-gnu.tar.gz
cd bitcoin-25.0/bin
./bitcoin-qt -testnet
This should open qt wallet on Linux in testnet mode.
Now that you’ve connected your wallet to Testnet you can start receiving testnet coins and try out Bitcoin transactions on the test network.
How to receive Testnet Bitcoins?
There are many free Bitcoin testnet faucets. Just Google the term “Bitcoin testnet faucet” and you will come across several websites offering free BTC test coins.
These coins are free and have no value. They are only great for experimenting and learning how to send / receive Bitcoin. Once you have learned how to use Bitcoin on the testnet you should move on to the mainnet.
Here are few faucets where you can get Free testnet Bitcoins:
- https://bitcoinfaucet.uo1.net/
- https://testnet-faucet.mempool.co/
- https://coinfaucet.eu/en/btc-testnet/
- https://testnet-faucet.com/btc-testnet/
Open your testnet wallet >> go to receiving tab and grab the receiving address. Paste your receiving address in the faucet, solve the captcha and enter amount to receive Bitcoin.
Once it gets 1 block confirmation you can start using it.
Now create another testnet wallet, create a new receiving address and practice sending coins to the other wallet. Just like actual Bitcoin transaction you’ll have to pay mining fees for transferring coins on the testnet as well. Also transaction from BTC testnet cannot be send to the mainnet or vice versa as they are two separate blockchains.
Just remember that Testnet addresses starts with “m”, “n” or “2M” and “2N” depending on the seed / address type you choose. Whereas Mainnet address begin with “1”, “3” and “bc”.
Play around with all the settings and wallet preferences. Once you got familiar with the wallet and the Testnet you can move on to real network. Before you do please do send the free testnet coins back to the faucet website as it helps others to get test coins.
You can run both testnet and mainnet wallet simultaneously.
Hope this Bitcoin testnet wallet helps you in learning how to use Bitcoin without risking your real money.
Here are few core and electrum wallet guides that you’ll find useful.
Core wallet guides:
- Complete core wallet beginners guide
- Blockchain pruning – Reducing core wallet size
- How to backup core wallet?
- What is Bitcoin address and how to get one?
- How to safely update Bitcoin core?
- How to move core wallet blockchain files to another directory?
- Guide to add nodes to your wallet
- Bitcoin core wallet console commands
- Fixing core wallet not syncing issue
- What does rescan and reindex command do?
- What to do when there are no block source available?
- How to create bootstrap file for faster synchronization?
Electrum wallet guides:
- Guide to verify electrum wallet signature
- How to safely update electrum wallet?
- Guide to backup electrum wallet
- How to import and sweep keys into electrum
- Tips on electrum wallet seed
- How to sign a message?
- How to create watch only wallet?