How to create Avalanche (AVAX) wallet? This is a quick beginners guide providing instructions on how to create and use the Avalanche wallet.
Well, you can connect your Metamask to avalanche network and use that as your AVAX wallet. But that can be only used as AVAX-C-ARC20 wallet. Metamask only supports Avalanche C-Chain which is a contract chain – An instance of Ethereum Virtual Machine powered by Avalanche. So on Metamask connected to Avalanche network C-Chain you can only store, send and receive AVAX and AVAX ARC20 tokens which is similar to the ERC20 on Ethereum and BEP20 on Binance Smart Chain.
Besides AVAX C-chain, Avalanche has 2 other separate chains namely X-Chain and P-Chain with each chain having separate role and featuring unique functionalities. To be able to store, send and receive AVAX on all three chains you need the Avalanche wallet also known as AVAX wallet.
With the official Avalanche wallet you can not only store, send, receive AVAX and ARC20 tokens but you can also transfer tokens between the Avalanche chains and stake AVAX on the Avalanche blockchain.
Avalanche Wallet ($AVAX)
Avalanche wallet is an open source non-custodial web wallet where you can securely store, send, receive and exchange your Avalanche assets. This includes AVAX; the native coin of the Avalanche blockchain, AVAX tokens and Avalanche NFTs. Other than that with Avalanche wallet you can perform cross-chain swaps, stake or delegate.
Here in this beginners guide we’ll walk you through the process of creating and using the Avalanche wallet.
The wallet is simple to setup and use. There is no need of any guide but anyways we decided to make this beginners guide as Avalanche blockchain is quite different than the others.
Avalanche Blockchain:
The Avalanche blockchain is a Blazingly Fast, Low Cost, & Eco-Friendly PoS (Proof of Stake) blockchain where users can stake AVAX to help secure the Avalanche network.
To stake AVAX and to earn AVAX as staking rewards you need to either become a validator or delegator. To become a validator you need 2000 AVAX tokens. By becoming a validator you’ll have an Avalanche node. If you don’t have 2000 tokens but still wish to stake AVAX then you can become a delegator. You do not own an Avalanche node but you’ll be staking using another node. For this you’ll only need 25 AVAX.
Now staking can only be done on the P Chain. So to become a validator or delegator you need to have AVAX on the Avalanche network P Chain.
As we said Avalanche is quite different than the other blockchains. It has 3 separate chains namely X-Chain, P-Chain and the C-Chain. Each chain has a separate role and each chain have different address format as well:
For example:
The AVAX (X-Chain) wallet address format starts with the letter X: X-avax1nehlqzhe064psg4r6wygzlx7yhc2s9h9n0jpjm
The AVAX (P-Chain) wallet address format always starts with the letter P: P-avax1nehlqzhe064psg4r6wygzlx7yhc2s9h9n0jpjm
Lastly the C-Chain is an instance of Ethereum virtual machine, hence the C-Chain address looks similar to that of Ethereum or Binance Smart Chain (BSC) address format: 0x4d63983d44b24450b567bdc91a19e80f0c7ad2f4
You need to understand the differences clearly so that you can avoid sending wrong tokens to the wrong chain.
X-Chain, P-Chain and C-Chain
On Avalanche wallet you can store and transact coins on any of these three chains. That is the Avalanche tokens can exist on X-Chain, P-Chain as well as the C-Chain. The stored tokens will have separate role depending on the corresponding chain.
P-Chain is Platform Chain which is a platform primarily used for staking which is to validate the primary network. It operates under the snowman consensus protocol that helps coordinate validators and enables creation of subnets and tracking of active subnets.
X-Chain stands for Exchange Chain which is a decentralized platform powered by Avalanche consensus protocol. The X chain is used to create and trade Avalanche assets with other digital assets.
C-Chain stands for Contract Chain, which is an instance of Ethereum Virtual Machine powered by Avalanche. It allows users to create smart contracts using the C-Chain’s API and interact with the DApps built on Avalanche.
On all three chains whether it is a normal transaction or a smart contract execution (gas fees) the transaction fee is charged in AVAX on the respective chains. FYI AVAX is the native token of the Avalanche blockchain.
You can learn more about the AVAX network on the official website: https://www.avax.network/
Alright! Let’s now setup the Avalanche wallet.
How to setup Avalanche wallet?
AVAX wallet is an open source web wallet.
1. To setup a new wallet go to https://wallet.avax.network/
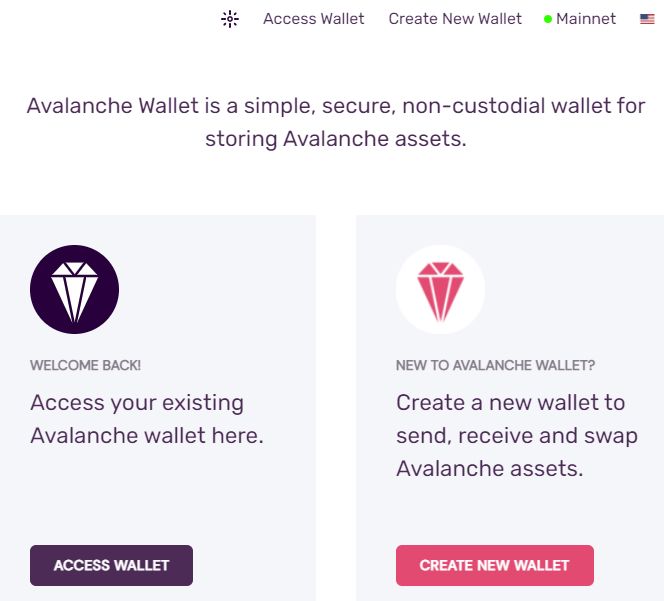
2. Then click Create a new wallet to send, receive and swap Avalanche assets.
3. On the next screen click generate a new key phrase to setup your Avalanche Wallet.
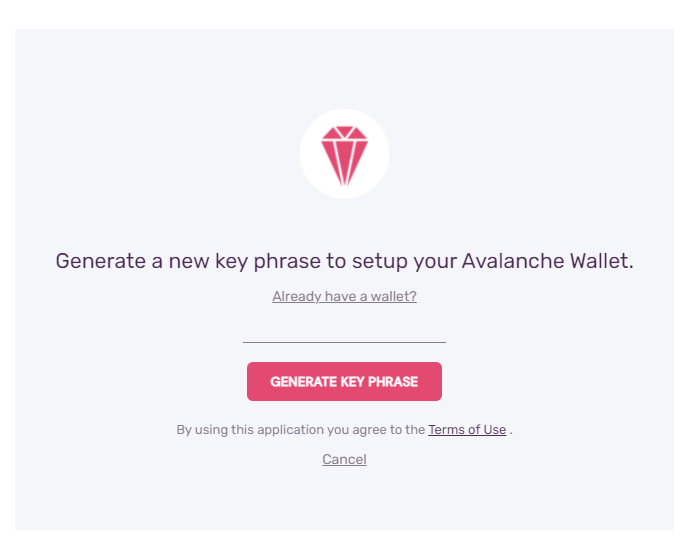
The wallet will then generate a 24 random words key phrase for you. You can regenerate a new set of words or copy the one shown on your screen. But make sure to backup the provided Passphrase. Order is most important and please note that this information is crucial to keep your Avalanche assets safe. Also never reveal this with anyone in which case your wallet will get compromised.
In future in order to completely recover / restore your Avalanche wallet you need to use these 24 words in sequential order.
Once you have the backup phrase secured click “I wrote down my key phrase in secure location” and click access wallet.
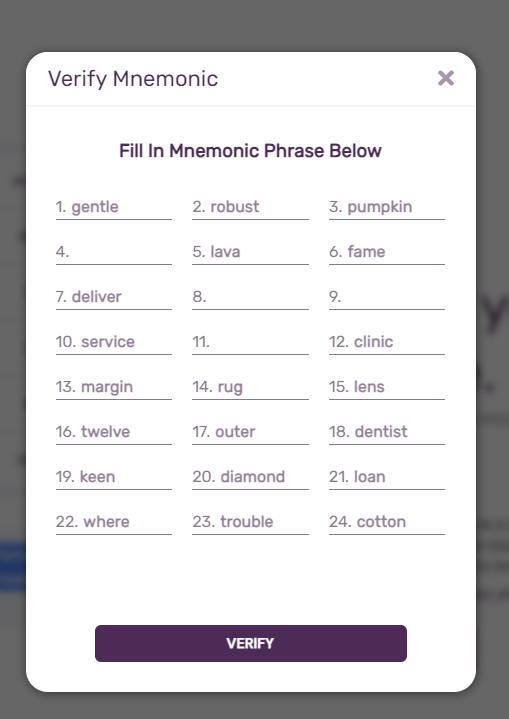
4. You’ll now be asked to verify the mnemonic order. Fill In the left out Mnemonic Phrase by referring your written copy. Once done click verify and then click access wallet to access your Avalanche wallet.
That’s it! Your Avalanche wallet is ready. You can start receiving coins and tokens.
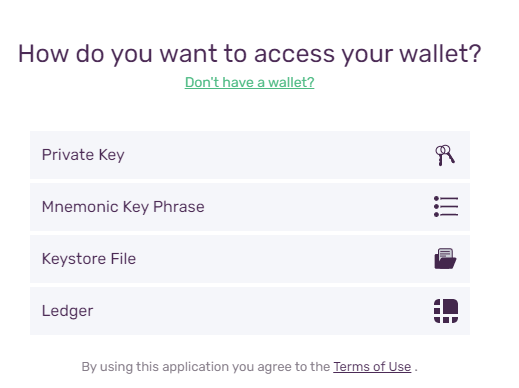
Note: Avalanche wallet logs you out on its own if you are not active. You have to re-login using your mnemonic phrase. Click access wallet to access your existing Avalanche wallet. Choose Mnemonic key phrase as your access option. On the next screen enter your 24 word mnemonic phrase and click access wallet to regain access to your wallet.
Avalanche address:
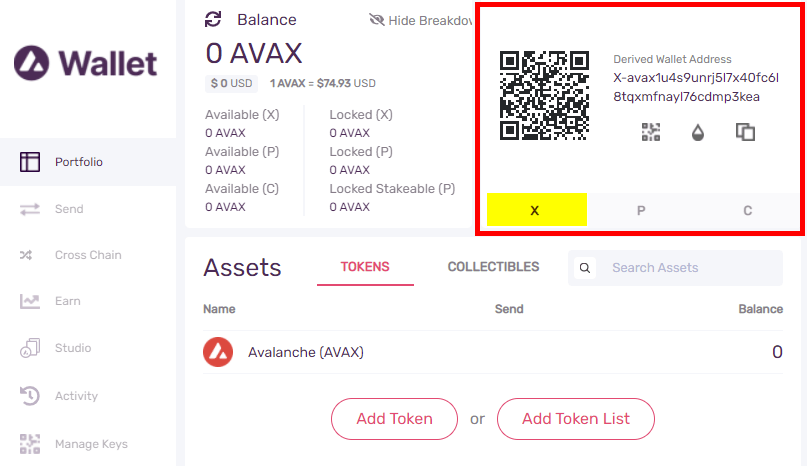
As you can see the wallet is plain and simple. The dashboard displays your asset information such as tokens and collectibles. Also on main screen towards the right side you’ll find your wallet address. The same page also displays your available / locked balance in X, P and C chains.
On Avalanche wallet you can store coins on Avalanche X-Chain address, Avalanche P-Chain address as well as Avalanche C-Chain address.
To receive funds first decide and choose the chain. Most exchanges support transfer of funds to X-Chain. But remember that Metamask only supports C-Chain.
You can get AVAX from exchanges like Binance.
Be sure to choose the right chain. Once chosen click the copy icon to copy the wallet address. Then send tokens to that address. Try transferring small amounts. Once you are confident and the transfer is successful move bigger amounts.
Also note that your X-Chain address will change after every deposit. But you can keep using your previous address.
Now that you have received tokens to your Avalanche wallet lets see how to send to an external wallet address.
Sending AVAX and fee to send Avax (C-Chain & X-Chain)?
Since P-Chain is the platform chain you cannot send tokens directly from P-Chain. You can only send AVAX from either C-Chain or X-Chain. If you got funds in your P-Chain address then you need to transfer it to X or C Chain using the cross chain feature which we’ll cover shortly.
Now before sending from your Avalanche wallet to an external address decide on the chain and make sure the external wallet or your exchange account AVAX deposit address supports that particular chain.
For example let’s assume that you got funds in your Avalanche wallet C Chain but the exchange where you are transferring to only supports X Chain address. In this case use the cross chain feature to swap funds from C-Chain address to X-Chain address. Then send coins from your X-Chain selected as source chain.
1. To send tokens go to send tab of your Avalanche wallet.
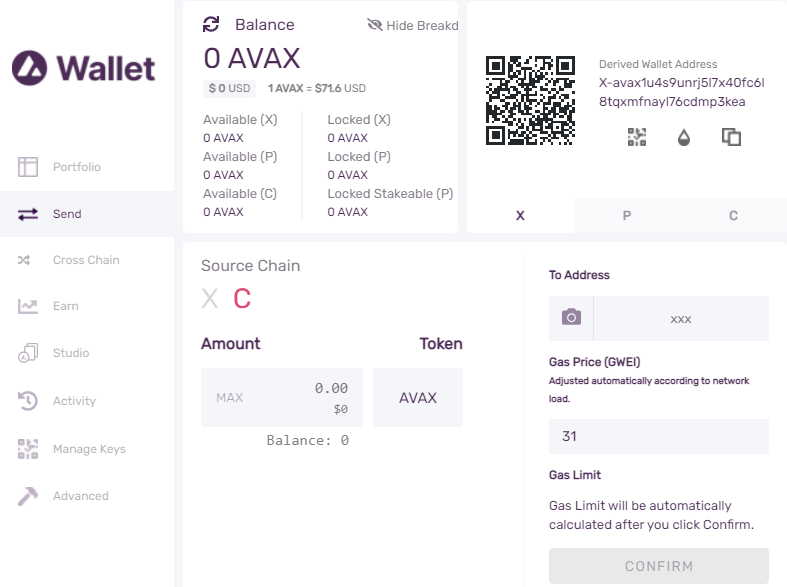
2. Next choose the source chain which is either X chain or C chain.
Note: To send AVAX or Avalanche assets from your Avalanche wallet you’ll need a small amount of AVAX which is the fee charged to confirm the transaction on blockchain.
If you are transferring using AVAX X-Chain then you’ll need about 0.001 AVAX for a transaction. If you are transferring from AVAX C-Chain then it’ll cost you about 0.004725 AVAX per transaction. As you see the fee amount is negligible.
3. Once the source chain is chosen select token, enter the to address and the amount to send. If you are sending it through X-Chain then take note on the memo. Some exchanges require memo to be included. If you are transferring through C-Chain then set the gas price (GWEI) and then confirm the transaction.
Remember to please carefully check the address and the chain before transferring coins / tokens on the Avalanche network.
Use the Avalanche block explorers to view address and to track the token transfers.
https://explorer.avax.network/
That’s it! Now let’s see how to transfer tokens between Exchange (X) , Platform (P) and Contract (C) chains using the cross chain feature.
Cross Chain – Transfer between X-Chain, P-Chain and C-Chain
Avalanche supports movement of AVAX between chains with the support of atomic swaps. So you can transfer AVAX Between the X-Chain, P-Chain and C-Chain.
Here is how to transfer AVAX tokens between the X-Chain, P-Chain and C-Chain.

Open your wallet and navigate to cross chain tab functionality for transferring between chains. Now in order to transfer AVAX between chains you need to have some AVAX as fee. So don’t transfer the entire amount. Leave some for fees.
Next choose the source chain (from) and destination chain (to). Upon selecting the source and destination chain you’ll see the available balance on both the chains. Then enter the amount to transfer from source chain to destination chain. The fee to transfer will be shown on the same screen. Verify it and press confirm transfer to initiate the transfer.
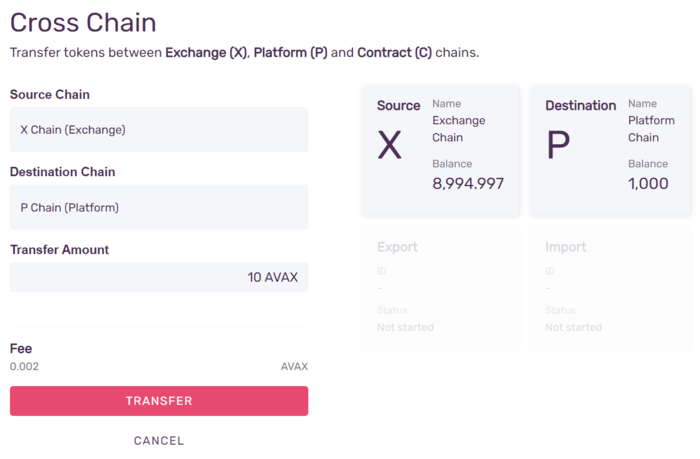
That’s it! You’ve successfully transferred AVAX between chains. Now you can use them as you wish. You can transfer the AVAX back and forth between any of the three chains anytime using your Avalanche wallet cross chain feature. All its going to cost you is small amount of AVAX as fees.
To learn more about transfer between chains using API calls check this link: https://docs.avax.network/build/tutorials/platform/transfer-avax-between-x-chain-and-p-chain
Earn AVAX
Another most important feature that you can find in your Avalanche wallet is the wallet earn feature. With earn you can earn more AVAX by staking your existing tokens.
As we said before in order to stake AVAX tokens and to earn AVAX you need to either become a validator or delegator on the Avalanche network. For this you need to transfer the required amount of tokens to the P-Chain chain.
Once you have tokens on the P chain you can validate or delegate and start earning.
For staking we’ll make a separate guide on how to stake your AVAX tokens using the Avalanche wallet.
If you wish to learn now without risking your coins then you can connect your wallet to the testnet and try the staking feature.
You can get testnet AVAX from the AVAX Test Faucet (https://faucet.avax-test.network/). Testnet is a free and easy way to get to play around with the Avalanche blockchain.
At the top right corner of your wallet you can switch between mainnet and Fuji testnet anytime.
Note: Don’t confuse the network. Your mainnet and testnet address are completely different but they are accessed using the same mnemonic phrase. When sending money on the mainnet make sure you’ve chosen mainnet wallet address and transferring it to the correct chain.
Ledger support:
Lastly other than accessing your Avalanche wallet using the mnemonic key phrase you can also access using your Ledger hardware wallet. Avalanche wallet supports hardware wallet integration; you can use your Ledger Nano S or Nano X. This will keep your coins safe and secure.
Setup your Ledger wallet and, install the Avalanche wallet app which is available via Ledger Live. Then connect and interact with Avalanche web wallet using your Ledger. By holding funds from your Ledger you can perform all actions such as sending AVAX, tokens, NFTs, doing cross-chain swaps as well as staking and delegating.
Here you can find the instructions on how to Set Up Avalanche web wallet on Ledger Live: https://docs.avax.network/build/tutorials/platform/setup-your-ledger-nano-s-with-avalanche
That’s all. Hope we’ve covered everything about Avalanche wallet and we hope you found this guide useful.