Most of you know that you can store ERC20 tokens on your Trezor and Ledger hardware wallets. But do you know that you can also use them to store and mange tokens like BEP20 (Binance Smart Chain tokens) and HRC20 (Harmony One tokens). Other than that both the hardware devices also support Polygon Matic network, Fantom network and most other EVM chains like Arbitrum, Avalanche etc.
Even though most EVM networks are not official supported you can still use your Ledger and Trezor to store and manage your favorite tokens on the network of your choice. Basically you can store any kind of tokens on any EVM compatible blockchains. Not only tokens but you can even store your NFTs on your Ledger / Trezor hardware wallet. HODL the NFTs in cold storage and secure your NFT collection Today.
Here in this beginners guide lets see how to store and mange any tokens using popular hardware wallets like Ledger and Trezor. Other than storing tokens we’ll also explain how you can securely store your NFTs and access NFT marketplaces like OpenSea using your hardware wallet.
Now before we see how to store and manage any kind of tokens or NFTs on your hardware wallet let’s go through the basics. You first need to understand the difference between a coin and a token, the different types of token standards and how they work.
If you were following us then by now you know how to store tokens and NFTs on your hardware wallet. We’ve not made an exclusive guide, but we’ve covered all of this previously in individual articles. Anyways we’ll provide a quick explanation here and share link to all the relevant articles. This should help you to store and mange tokens and NFTs on your Ledger Nano and Trezor hardware wallets.
Why hardware wallet?
If you are just getting started with this space then buying cryptocurrencies is going to be your first task. One of the biggest challenges comes after you buy a coin or a token is how to secure them.
You see Hardware wallets are considered to be the gold standard for safety in the crypto space. They give you both safety and convenience. To keep your assets safe we recommend popular hardware wallets like Ledger or Trezor. Both are safer and offers a better way to store your crypto assets.
Both Trezor and Ledger are well known user friendly hardware wallets in the industry. A hardware wallet is a physical device just like an USB device which you can use to store your cryptocurrencies securely.
When we say cryptocurrency we mean the private keys. You need to understand that the actual assets are not stored in your wallet. They are on the respective blockchains. Your wallet just holds the private key to unlock those funds. Hardware wallets are cold storage that stores your private keys securely offline and they are much safer than software and web wallets.
Ledger and Trezor are both industry leaders when it comes to crypto security. Their devices use BIP39 passphrases where the private keys never leaves the device.
Asset support
Other than security they both are a true multi-currency wallet that supports over 1000+ cryptocurrencies. You can store popular coins like Bitcoin (BTC), Ethereum (ETH), Binance Coin (BNB), Polkadot (DOT), Cardano (ADA), Solana (SOL), Ripple (XRP), Monero (XMR), Stellar (XLM), Avalanche (AVAX), Terra (LUNA), Tezos (XTZ) etc.
Other than coins you can also store tokens like USDT, USDC, Shiba INU (SHIB), wBTC, DAI, Chainlink, FTX, Axie infinity (AXS), AAVE, MANA, Uniswap (UNI), Graph Token (GRT), Yearn.Finance (YFT), Celo (CELO), Ocean Token (OCEAN), Reef Finance (REEF) etc.
Now before you decide on whether to go with Ledger or Trezor take a look at the assets supported by them. First you need to find out the coin / token that you own is supported by the device.
Check out Ledger supported coins and tokens here – https://www.ledger.com/supported-crypto-assets
For Ledger device also check out this GitHub link: https://github.com/LedgerHQ/ledger-live-desktop/blob/v2.29.0/cryptoassets.md
Here you can search for your favorite token using the smart contract address and find out whether Ledger supports it or not.
Check out the Trezor hardware wallet supported coins and tokens here: https://trezor.io/coins/
Managing assets
After your buy and setup your hardware device you can’t use it right away. You need a compatible software wallet to manage your hardware wallet assets.
For example to send a transaction you need to plug in the device to your computer and connect it to a web or a software wallet. You only use the software interface to initiate the transaction. But the transaction is signed by your hardware wallet.
Wherever you connect your hardware wallet to and whatever the type of transaction it is the signing always happens inside the hardware wallet. Your private keys stays safe and it never gets exposed to a website / software or a computer that it is connected to.
To manage your hardware device both Ledger and Trezor offers official software wallet interface. For Ledger devices you have the Ledger live application which is available for desktop and mobile devices. For Trezor devices you have the official Trezor Suite desktop app. Both the applications allows you to manage your hardware device seamlessly. You can send, receive funds, manage variety of assets, track real time crypto balance and it even provides complete access to your portfolio information.
However there are some limitations. Both Trezor suite and Ledger live application do not have full support for all the coins and tokens that are available on the crypto space. They support Ether and majority of ERC20 tokens. But how about BEP20 tokens, ERC-777 custom token, ERC-721 etc. The device supports NFT’s and all kinds of custom tokens on other EVM chains as well however you can’t manage them directly through the official apps like Ledger live or Trezor suite.
To manage specific type of assets you need specific type of wallet (software interface). The link above; that displays the list of supported coins and tokens also specifies the type of wallet you need to manage your crypto assets.
App compatibility
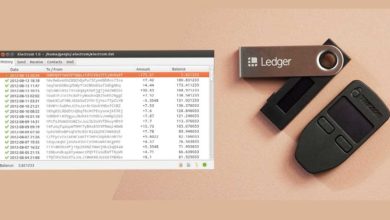
In addition to using the official app both Trezor and Ledger also supports integration with many other third party wallet applications. There are many independent wallets like Electrum (for Bitcoin), MyEtherWallet, Mycelium, MetaMask, MyCrypto etc.
Check out the list of Trezor supported apps here: https://wiki.trezor.io/Apps
You can use these third party wallets to manage assets that are not officially supported by Trezor. Other than the ones listed on the official site there are many other third party wallets that supports Ledger and Trezor hardware wallets. All you have to do is connect your hardware wallet device to the software and once connected you can send/receive and store any tokens of your choice.
Also both Trezor and Ledger supports NFT transactions. That is they allow for receiving, storing and sending NFT tokens (all NFTs created according to the EIP-721 standard) that exist on the Ethereum network. But to manage and sign an NFT transaction you need to connect and use your hardware wallet with a third party software interface.
For example you can use MyEtherWallet, Metamask or a similar application to store and manage Ethereum, ERC-20 and, EIP-721 tokens on your hardware wallet. For BEP20 tokens, tokens on polygon chain and for other EVM tokens you can use your hardware wallet with Metamask.
Now what is EVM, ETH, NFTs, ERC20, BEP20, HRC20, coins and tokens?
EVM, ETH, NFTs, ERC20, BEP20, HRC20, coins and tokens?
Again we’ve explained all of this previously in several different articles. Anyways first understand the difference between a coin and a token. Coins uses is its own standalone blockchain. Whereas tokens don’t have or run on their own blockchain. They are hosted and issued on another blockchain. Let’s look at Ethereum and ERC20 tokens for instance.
Ethereum is an open source blockchain and a computing platform that allows for creation of tokens, smart contracts and decentralized applications. ETH (Ether) is a coin and is the native cryptocurrency of the Ethereum blockchain.
ERC20 is a custom user created token on the Ethereum blockchain. Anybody can create an ERC20 token that follows a list of standards which can be used in transactions and can be exchanged for other tokens. Currently there are over 70,000 ERC20 tokens in existence that all follows the ERC20 Token Standard.
Other than ERC20 there are other type of tokens on the Ethereum blockchain as well like ERC-777 and ERC-721. For example NFTs (Non Fungible Token) uses ERC 721 which is the official token standard for NFTs on Ethereum.
Now since tokens like ERC20 and ERC-721 are all created on the Ethereum network you can use your Ethereum address to store and manage these assets. And to transfer these tokens on ETH network you have to pay transaction fees in ETH as it is the native currency of the Ethereum blockchain.
It is important to note that you can store ERC-20 and other Ethereum based tokens on any popular Ethereum wallet except your exchange address. If you are sending a token to your exchange address then first ensure that the exchange supports that particular token. Sending unsupported token may lead to the permanent loss of that particular token.
Here is a guide to avoid transferring wrong token to incorrect chain or address.
On the other hand, if you use an Ethereum wallet where you control the private keys then you can send any ERC20 and NFTs to your Ethereum address. The tokens are stored in the address to which you control the private keys. You can verify the token balance on block explorers like Etherscan. However transacting and managing such tokens can be a bit of a process on certain wallets.
Alright! You now know the difference between coin and token. Also you know the fundamentals of ETH, ERC20 and other token standards on the Ethereum network. Now what about tokens like BEP20, HRC20 etc.?
Alternate EVM network tokens
Here read the difference between BEP20, BEP2, ERC20 and TRC20 tokens.
- ERC20 tokens are tokens issued on the Ethereum blockchain.
- BEP20 tokens are tokens issued on the Binance Smart Chain.
- And HRC20 tokens are tokens issued on the Harmony One network.
The success of Ethereum blockchain has led other blockchains to provide similar features like allowing creation of tokens, smart contracts and decentralized applications. There are chains that uses its own distinct technology, then there are ones that are EVM (Ethereum Virtual Machine) compatible. Check out the list of EVM blockchains that offers features and functionalities similar to that of Ethereum.
You have side chains like Matic (Polygon), Arbitrum and Optimism. Also you have independent blockchains like Binance Smart Chain, Harmony One, Fantom etc.
All of these are EVM chains that uses and supports the Ethereum token standard. So not only ERC20, but using your Ethereum address you can basically store any type of token on any EVM network. Since they all are EVM compatible the wallet address for all these network starts with the characters “0x”.
Alright! Now lets see how you can store tokens and NFTs safely on your Hardware Wallet such as Ledger Nano & Trezor.
Storing tokens and NFTs on hardware wallet
Ledger and Trezor devices has full support for Ethereum (ETH) and ERC20 tokens. They also support NFTs and since it supports tokens built on the Ethereum platform it also supports tokens on other EVM chains. You can simply send any token to your hardware wallets Ethereum ERC20 token address that starts with 0x. However the transaction and the deposit may not be shown on the official apps like Ledger Live and Trezor Suite.
Not to worry the tokens are securely held by your device on the respective blockchains. And the device secures the private keys of all your address across all blockchains. To check the token balance you can use the specific block explorers.
Now to access, store and manage the non supported tokens you’ll need to use your Ledger and Trezor devices with alternative wallet softwares like MyEtherWallet (MEW) or Metamask. These wallets are designed specifically for Ethereum assets and they support any kind of ERC20 tokens. Other than ERC20 app like Metamask can also connect to other EVM blockchains so this will make managing of tokens and NFTs using hardware wallet simpler.
All you have to do is setup Metamask and connect your Ledger / Trezor device to Metamask. Not to worry. Your seed and private keys are fully protected by your hardware device. They are never exposed under any circumstances. Think of Metamask as a dashboard that lets you to better manage the assets on your Ledger and Trezor hardware wallets.
Metamask and Hardware wallet connection
First of all we hope you have a fully setup Metamask. We’ll not go through the setup process of Metamask again as we’ve already covered it previously.
Here is a beginners guide to setup and use Metamask.
Next you need a fully setup Ledger or Trezor device. While setting up; the device generates mnemonic seed for your wallet. This is your backup. Write it down in a paper and keep it safely offline. For Ledger and Trezor device setups you can make use of the guides available on the official website. The setup process is easy and is only going to take a few minutes.
Now after you have the Metamask and your hardware wallet ready the next step is to connect the two.
Learn how to connect and use Ledger or Trezor hardware wallet with Metamask.
While connecting Trezor to Metamask is straightforward; Ledger requires some extra steps like: 1. You need to install Ethereum app on the Ledger device. 2. You need to enable browser support so that Ledger Nano can work with Metamask. 3. Also you need to enable the contract data on the Ethereum app settings to able to create token transfers. Lastly make sure to keep the Ethereum application opened in your Ledger Nano.
We’ve explained all of this in the above article. Please refer to it to connect your hardware wallet to metamask.
Alright! You’ve successfully connected your hardware wallet with Metamask. Now let’s see how to manage any tokens and NFTs.
Store & mange any tokens on Ledger & Trezor
First of all ERC20 tokes and majority of NFTs are on the Ethereum blockchain. So all your tokens will be included under your Ethereum account. To store tokens in your hardware wallet simply send them to your hardware wallet ETH address. That is you can send assets to the ETH address generated by your device.
After successfully connecting Metamask and hardware wallet your hardware wallet’s ETH address will be imported to Metamask. Such address will be labeled as Hardware.
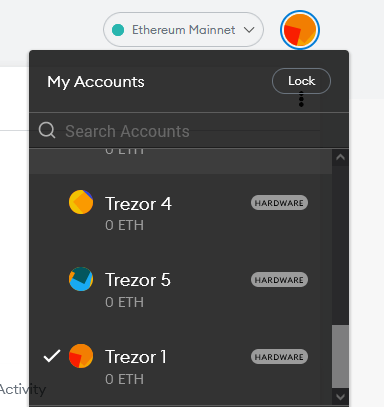
Open metamask and only use those addresses that are labeled as Hardware for receiving Ether and ERC20 tokens. You can transfer any Ethereum based tokens to your hardware wallet ETH address connected to metamask. It’ll display your ETH balance and your ERC 20 token balance separately.
Metamask displays most of the tokens under your account except few custom tokens. Do not panic if the ERC20 token that you sent it to your Ethereum address is not shown. Always first verify block explorers and as long as you control the private keys you should be fine.
You can add any custom tokens manually that are not displayed by Metamask. Once you’re done adding them, the missing deposit will appear under your ETH account in the metamask interface.
To add such custom tokens manually you have to provide the token contract address, token symbol etc. Learn how to add any custom tokens to Metamask.
Tip: For finding token contract address you can use block explorers like Etherscan or even use the token’s official website. Beware of fake tokens. We suggest you to go through this Metamask security tips which helps you stay away from scams and phishing attacks.
Managing alternate tokens
Now Metamask by default is connected to the Ethereum mainnet and so it only lets you to access and mange ETH and ERC20 tokens stored on your Ethereum wallet. To be able to store, manage and transact tokens on other chains you need to add the particular chain to metamask and switch to that particular network.
Here are few guides:
Connect Metamask to Binance Smart Chain
Add Fantom network to Metamask
Guide to add Polygon (MATIC) network to Metamask
Connect Metamask to Harmony One network
Connecting metamask to Avalanche C-Chain
Add Arbitrum L2 to Metamask and know how to bridge ETH
Learn how to add any EVM network to metamask
With the help of these guides we hope you’ve successfully added your favorite EVM network. Now you can basically transfer any tokens to your metamask ETH address as long as the network is EVM and the tokens are based on the ERC20 standard.
For example to send BEP20 tokens from Binance, make sure to select the BEP20 network type when withdrawing. After you send it to your ETH address switch your metamask to Binance Smart Chain network and metamask will display your BEP20 tokens. Not only display but it also allows you to take full control of the asset.
You can now transfer tokens, connect to dapps, start staking and perform any DeFi activities using your hardware wallet. Ledger and Trezor are the top picks when it comes to DeFi wallet. You can store any stablecoins on your Ledger / Trezor and connect it to DeFi sites like Aave, Compound and start staking or lend your stablecoins safely from your hardware wallet.
Transferring tokens:
To send ERC20 tokens, you need ETH as gas. Likewise for each network you need the specific native coin to cover transaction fees on that particular network. For example to transfer BEP20 tokens you need BNB and to transfer tokens on Polygon network you need MATIC.
To learn how to transfer tokens from your hardware wallet connected to metamask please refer to this guide:
https://coinguides.org/connect-ledger-trezor-with-metamask/
Alright! We’re almost done. With this walk around you can basically store and mange any tokens directly from your Ledger or Trezor wallet. Without any worries you can now confidently connect your metamask to any Dapp site. Since all transaction happens within the hardware device your private keys are never exposed.
If you are holding large amounts of ETH or ERC20 tokens then Trezor or Ledger is highly recommended. This is the most secure and convenient option for holding and transacting ETH, ERC20 and other tokens.
Alright! How about NFT transactions?
NFT transactions
NFT transactions are similar to ERC20 and other token transfers. You can simply transfer any NFTs to your hardware wallet ETH address. Not only Ethereum based NFTs but using your hardware wallet ETH address you can mange NFTs on polygon, BSC and other EVM chains.
Now metamask do not display NFTs under your ETH account. To view and manage NFTs you need to connect your metamask hardware wallet account to OpenSea which is an NFT marketplace.
Here is how its done.
OpenSea connection
Visit OpenSea and log into OpenSea with metamask. Make sure to use the account / address that is connected to your Ledger or Trezor. After connecting to metamask you can operate your accounts and NFTs normally.
On OpenSea you’ll see all your NFTs. You can hold it, transfer them or list it for sale. Now just because confirming transactions happens within the physical device doesn’t mean you need to keep your device connected all the time. Once the transaction is initiated and your NFTs are listed for sale you can disconnect your device.
This way you can safely stake tokens, sell NFTs directly from your Ledger or Trezor. This is the gold standard for safely storing tokens and NFTs in your wallet. You can now peacefully sleep at night knowing that your JPEGs are safe and sound.
Note:
Before transferring NFTs or tokens to hardware accounts try sending a tiny bit of tokens and cheap NFTs first to test it out. Then try transferring the tokens and NFTs out of your hardware wallet. If you can do this successfully then you can transfer all the expensive items to cold storage. Remember you have to pay gas fee to transfer NFTs and tokens.
Also don’t use this method for Tezos, Solana and Cardano NFTs. These are distinct networks and not EVM compatible like BSC, Polygon. Metamask is only for Ethereum, ERC20 and other EVM chains which actually make up the majority of DeFi space and NFT market.
Anyways to manage tokens on other distinct networks you are going to need a wallet that works with that specific network. For example for Tezos you need to use the Temple wallet and connect it to your Ledger or Trezor hardware wallet. Temple wallet is similar to Metamask but designed for Tezos.
To connect to Solana network using your Ledger or Trezor you can use the Phantom app which is a browser extension similar to Metamask but designed specifically for Solana.
That’s all! Hope it clears out. If you got any questions regarding storing or managing tokens and NFTs on Ledger / Trezor hardware wallet then do let us know in the comments below.

Thanks for this article and all the links.
Managing NFTs with Ledger on OpenSea works fine but it’s not the case for Nfts stored on Trezor. It’s impossible to list or even transfer them while using Trezor. It always shows action denied when we try to sign. There is obviously a bug and neither Opensea, Trezor nor Metamask think it’s their responsability. The only way to go ‘around’ is to use MEW to transfer an ERC-20 Nft to another address (not Trezor) but so far it looks there is no way to manage NFTs on Polygon network and they become stocked in a wallet using Trezor?Metamask. If anyone can bring some assistance, that would be great to share it as I’ve looking for a solution for months.
Enjoy your day!
Hi Morrgan,
Im having the same problem. trezor – metamask – opensea = unable to transfer or sell my nfts.
It sounds like you found a solution using my ether wallet. Can you elaborate on exactly how you were able to do this for etc-20 nfts? If i download MEW how do i even connect this to my specific metamask wallet and then send it off?
Would really help!!!
Hi Sbrarran,
After looking online in many places that’s the only solution I’ve found for NFTs on the Ethereum chain (ERC-721). Trezor/Metamask/Opensea, bad combo and no possibilities to transfer or list Nfts. Using google chrome and Metamask, you can go to MyEtherWallet and connect your wallet metamask/trezor address. Then you will find “manage my nfts’, which allow you to transfer them to a different address. Unfortunately, I haven’t found anything how and where to manage Nfts on polygon when using Metamask and Trezor at the same time.
Hope this will help you.
Thank you so much. I hope you have success. This is all new stuff, so I’m sure it’ll be built soon.
Additionally looks rare is also working on Trezor integration. So hopefully we’ll have plenty of options soon.