Masternode is a computer or a full node that is fully synced with the network and is running 24 x 7. Masternodes are completely different than the normal nodes or the wallet which you use to store your cryptocurrencies. They are different because apart from keeping the full blockchain and relaying transactions they provide special functions to the network such as: increasing transaction privacy, providing faster transaction times, enabling budget and treasury system, participating in governance and voting etc.
In order to turn an ordinary node to masternode one first need to own a specific amount of coins as a collateral which depends from coin to coin. Then VPS is required to keep the node running 24 x 7. Once these two are in place all a user needs to do is edit the masternode config file, configure the VPS and setup the cold wallet accordingly. Once the masternode is set and running; it powers the project’s network by providing decentralize operations. Not only that but masternode also rewards its owners as an incentive for investing in the coin and supporting the blockchain. Alright! But why a VPS is required to operate a masternode?
VPS recommendation
Unlike wallet staking which is usually performed on a user’s computer, a VPS (Virtual Private Server) is required for masternodes. Why is that? First of all to setup a masternode; a dedicated static IP is required. Then to provide a stable connection and to keep the node running 24 x 7 you must ensure that the computer operates without any interruptions and has 99.99% up-time which only a remote server can offer. Moreover unlike home PC; a VPS is dedicated to serve only one purpose that is run a masternode more securely and efficiently. Previously in one of our posts we’ve stated all of the masternode requirements; more particularly we’ve explained why a VPS is needed and why a home PC won’t work.
Why Digital Ocean?
Now as you have understood the benefits of masternodes you might be looking for a hosting service to host your masternode. When choosing a hosting provider the most important thing which you must consider is price, reliability and features. This is not our personal opinion but just ask anyone who is running a masternode. Most would recommend you to either go with Vultr or Digital Ocean.
They both are affordable, reliable, offers variety of options and provides the best user experience. Deploying and managing a VPS with them is so simple. Also both the hosting providers are equally great to host a masternode. Anyways since this guide is all about setting up a server on Digital Ocean here we’ll only cover Digital Ocean. Soon we’ll make a separate guide on creating a masternode server on Vultr.
Before we get into this guide do note the following: First of all this is not a masternode setup guide. It will not cover which Masternode coin to choose. We won’t be explaining how to compile wallets on VPS, installing dependencies, installing sentinel, creating swap file or any other configuration.
This guide will simply assist you in creating an account and deploying the right masternode server on Digital Ocean. Consider it as a part 1 of Masternode setup.
Creating an account on Digital Ocean
Head to DigitalOcean.com and click on signup at the top right corner. Enter your username, email address, password and click on create your account.
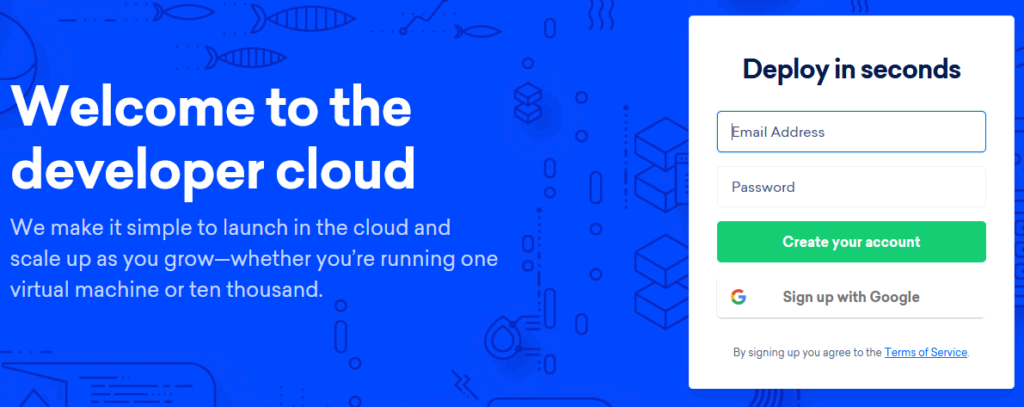
Affiliate Disclaimer: The above link is a referral link. When you sign up using our referral link you simply help us earn a small commission from the purchase you make. It will not cost you anything extra. However as a token of appreciation and for using our link you’ll get an account credit of $100 as bonus which is valid for 60 days.
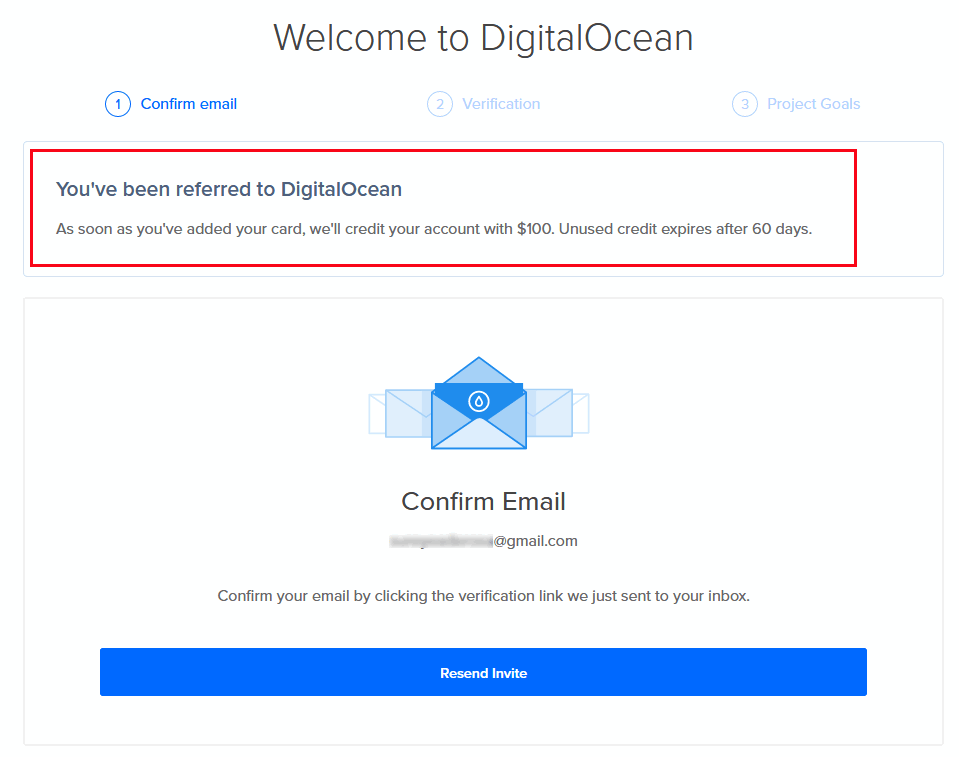
Now once your account is created you’ll be asked to verify your email. Confirm your email by clicking on the verification link which you’ve received.
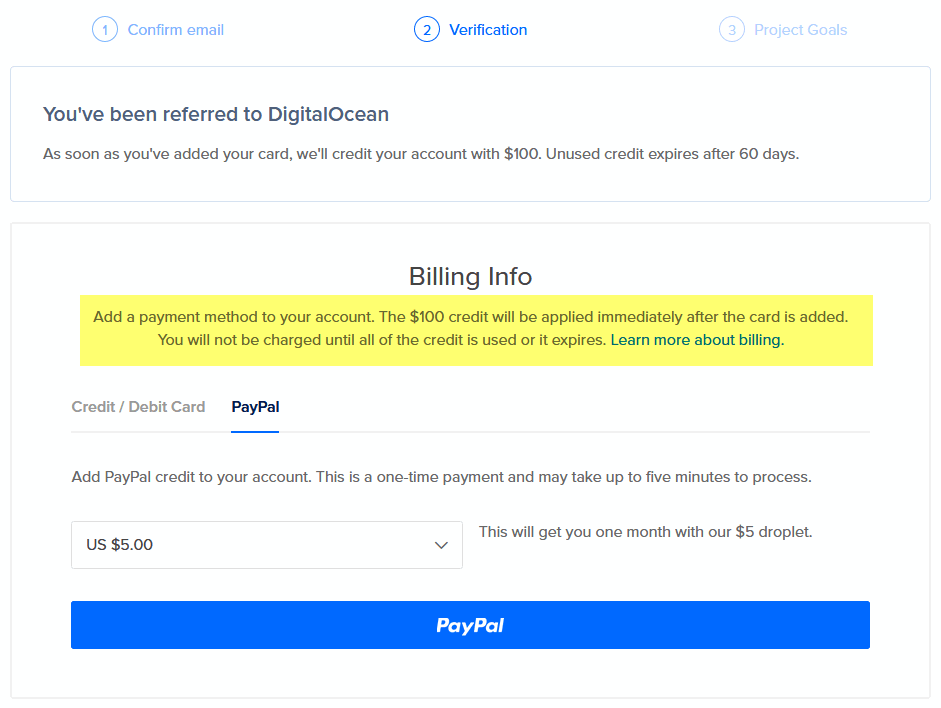
Once you’ve verified you’ll need to link your payment information. You can either choose credit / debit card or PayPal option. Do not worry; you won’t be actually charged until your $100 credit expires.
After this step it is time to create a new project. On the next screen you’ll see project goals or you can directly login to your account and click on new project towards the left hand side. Just name your project anything as you wish, leave the description field blank and choose purpose as educational purpose or service.
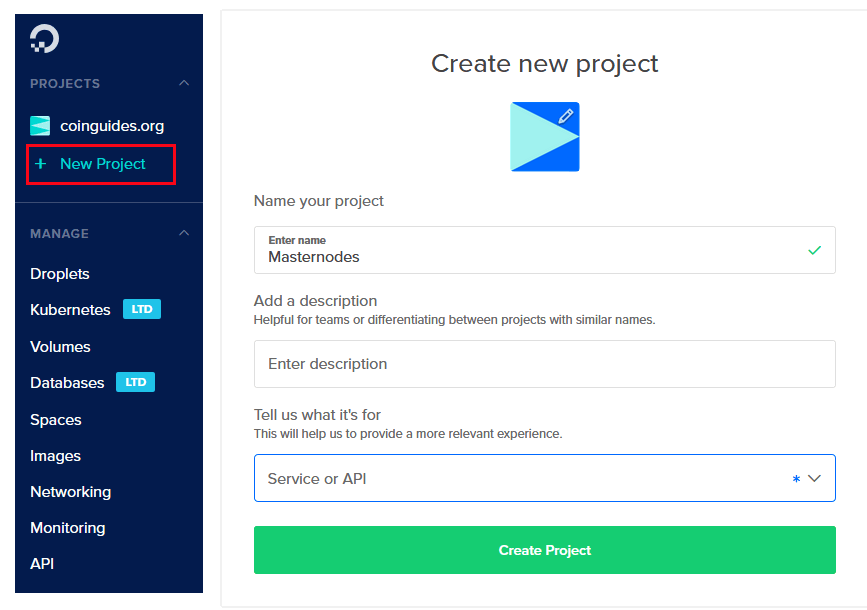
Since you’ve created a new project you can now start deploying a droplet. Droplets are nothing but a virtual server in Digital Ocean. Each droplet is one server and as far as we know there is a limit of 5 droplets per user. Alright! Now let’s create our first droplet.
Deploying a masternode server in Digital Ocean
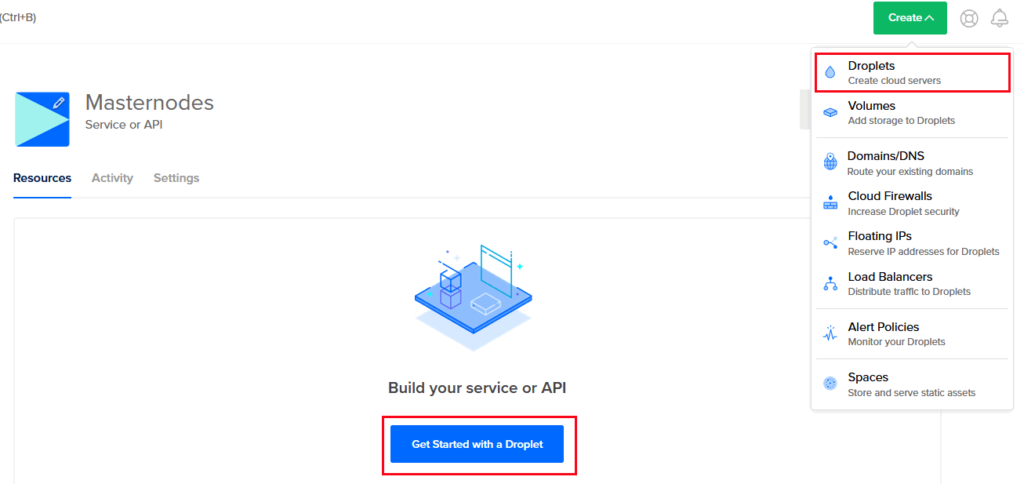
Click on “Get started with a Droplet” or at the top right corner drop down create and click on Droplets. Now it’s time to choose a plan and configure the server for your needs.
Choosing an image
We can even setup masternodes on Windows server but Ubuntu 16.04 is largely recommended by many masternode coins. So why Ubuntu 16.04.6 and not the latest 18.10? Sure, you can also choose 18.10 or 18.04 but many masternode coins do not support the latest versions. At the moment most masternode service only works perfectly on version 16.04. So it is recommended that you go with 16.04 for now. Anyways 16.04 will become obsolete in 2 years and there won’t be any support for this version.
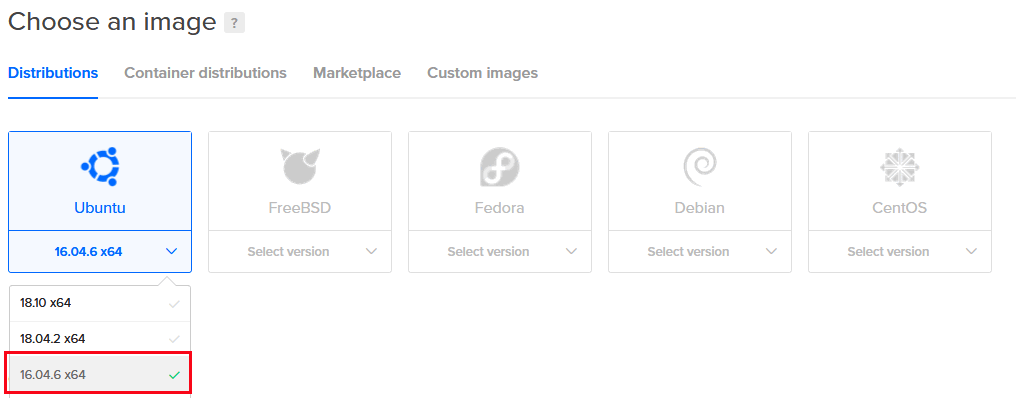
For now just choose Ubuntu 16.04.6 x64 as an image and proceed to choose a plan.
Choosing a plan
The server which you are going to create is for your masternodes. The standard server starting @ $5 per month is more than enough to host a masternode. This package includes 1 virtual CPU, 1 GB of RAM, 25 GB SSD and up to 1000 GB of data transfer per month. This plan is enough to get started with masternodes and you can run up to 2 to 3 masternodes (different coins) in this particular server.
Note: A lots of users will debate that 1 GB RAM is not enough for compiling wallets. Yes, it is True. However do note that Digital Ocean allows users to create a swap file on disk. We thing this is enough to compile and build binaries. Soon we’ll make a separate guide on creating swap file.
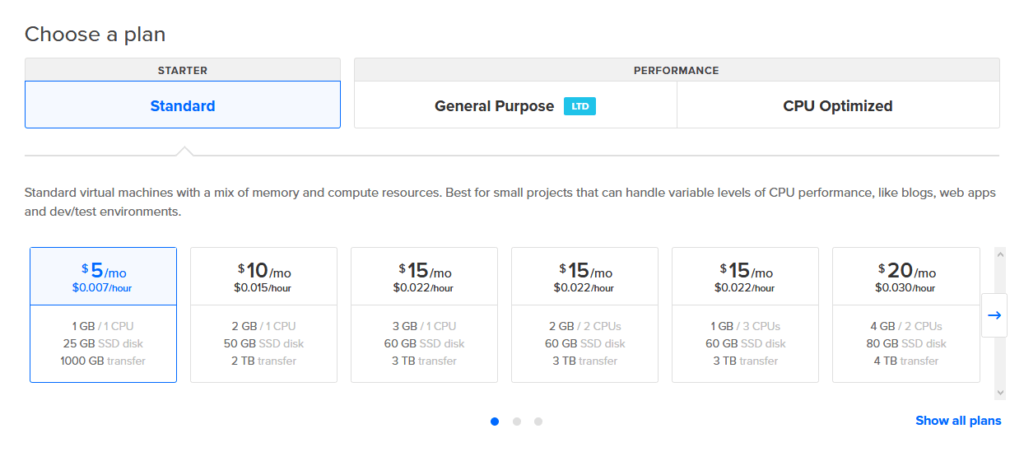
As of now the choice is yours. You can either choose $5/month server or $10/month plan which offers 2 GB of RAM, 50 GB SSD and 2 TB of data transfer. Anyways as we said already most masternodes will run perfectly on a server that costs $5/month.
Backups, data center region and additional options
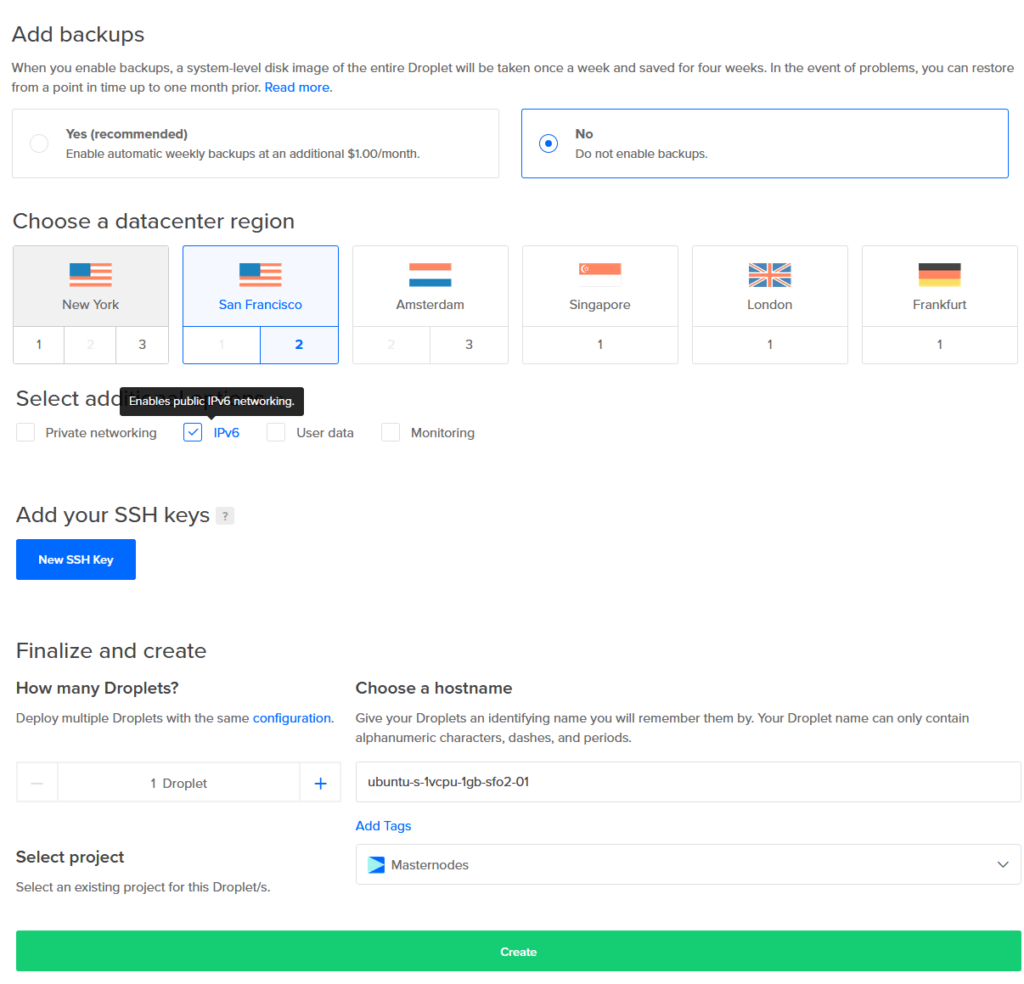
Once you have chosen a plan, add backups if necessary which will cost you $1 extra / month (usually backups are not needed for masternodes). Choose a data center region as per your wish (you can select any location you want). Then in additional option choose IPv6 and then finally click on create.
Great! You’ve deployed your first server. Now after specific wallet setup and configuration we can make this server function as a masternode. It will act as a hot wallet and it will stay online 24 x 7.
Note: As we already said here we won’t be covering any of the masternode setups such as creating swap file, installing dependencies or compiling wallet which all will be covered in a separate tutorial.
Connecting to your remote server
Now as you’ve deployed the VPS (Virtual Private Server) we need to learn how to access and operate this remote server.
To securely connect to your Linux VPS We’ll be using an SSH (Secure Shell) client.
If you are on Windows computer then download PuTTY which is a free open source SSH client for Windows. This application; PuTTY will allow you to interact with your remote server. In the upcoming masternode guides this application is what we’ll be using to setup server, install dependencies, configure wallet and everything.
If you are a MAC user then you don’t need PuTTY as by default you have this application called “Terminal” which you can use as an SSH client.
Download, install and open PuTTY if you are on Windows PC. Open Terminal application if you are on MAC.
Now to initiate a connection with your remote server using these SSH clients we need the following information:
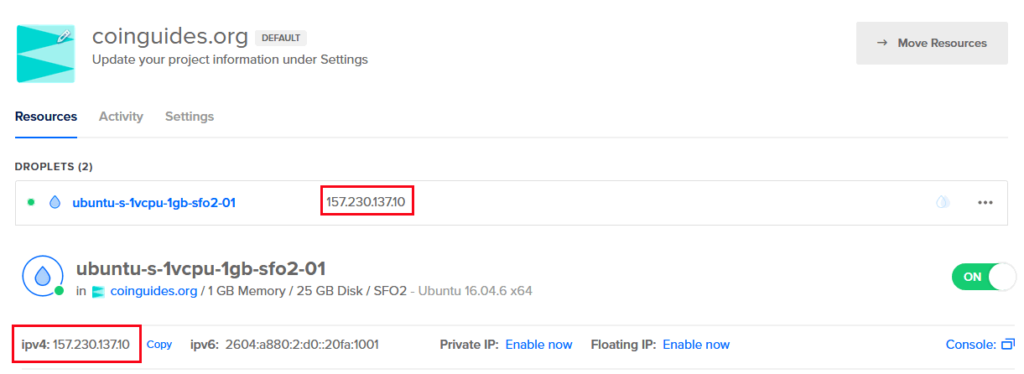
- IP Address of your VPS
- Username and
- Password
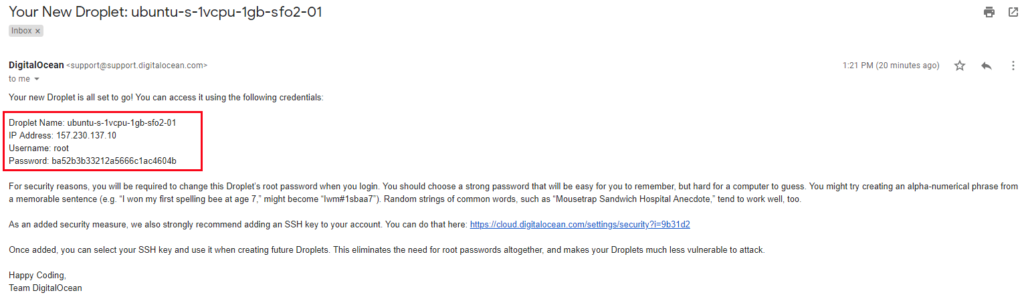
The moment you create a droplet in Digital Ocean you’ll receive all of these information via email. Login to your email and you should find an email from Digital Ocean similar to this.
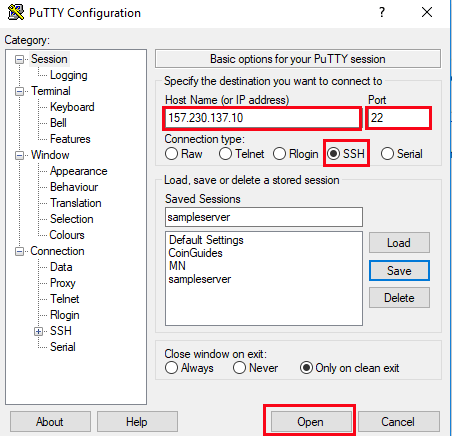
Open PuTTY or the Terminal window, enter the IP address, choose port as 22, choose connection type as SSH and then click on open to initiate a connection.
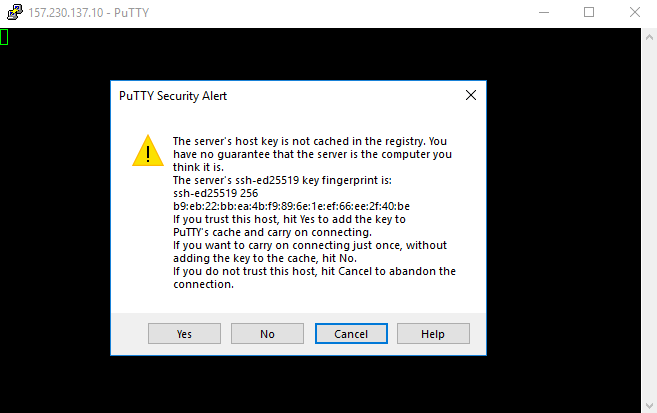
You may now see PuTTY security alert popup screen. Nothing to worry. Just click yes and proceed further.
Now login as “root, click enter and then copy paste the password which you’ve received in your email.

Note: For security reasons the terminal window won’t display anything in the password field. So whether you are typing or pasting password, once done hit enter. Also to paste any copied text just right click and you should be good to go.
Since this is your first time login you’ll be asked to change the password for root. Paste the current password from email, hit enter and then enter your new password. As we said the terminal window does not show any inputs in the password field so just type or paste and press enter. Now retype your new password and hit enter again.
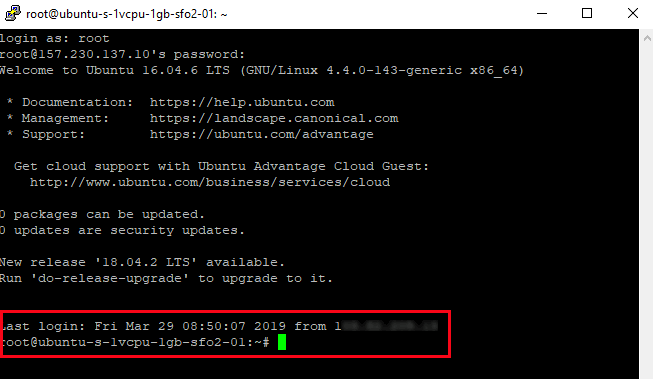
You’ll now see a line similar to this:
root@ubuntu-s-1vcpu-1gb-sfo2-01:~#
It means you’ve successfully connected to your remote VPS.
Great! Your first server is ready. Now to setup a masternode we need to prepare this VPS which as we said initially we’ll cover that in a separate article. In the mean time familiarize yourself with masternode and Linux commands which will help you in the upcoming masternode guides.
As we said this is part 1 of Masternode setup which is creating a server on Digital Ocean. If you are new to masternodes are do not have any prior knowledge on web servers then we hope you found this guide useful. If so then please do share it, follow us on Twitter and do subscribe to learn more about cryptocurrencies and blockchain technology.
Thank you very much for the guide!